
Optimizing Sand Casting Pattern Design
The customer almost never sees the most important part of a sand casting, because that’s the pattern. The pattern is what forms the cavity in the sand that’s subsequently filled with molten metal. Get the pattern design right and the sand casting process produces quality parts that need a minimum of machining. Get it wrong and you’ll be forever wrestling with casting defects, poor yields and customer complaints.
Making a Hole in the Sand
Unlike die casting, which needs precision molds machined from massive pieces of steel, sand casting needs nothing more than sand, two boxes and a wooden pattern. That makes it an economical process for small and medium volume orders.
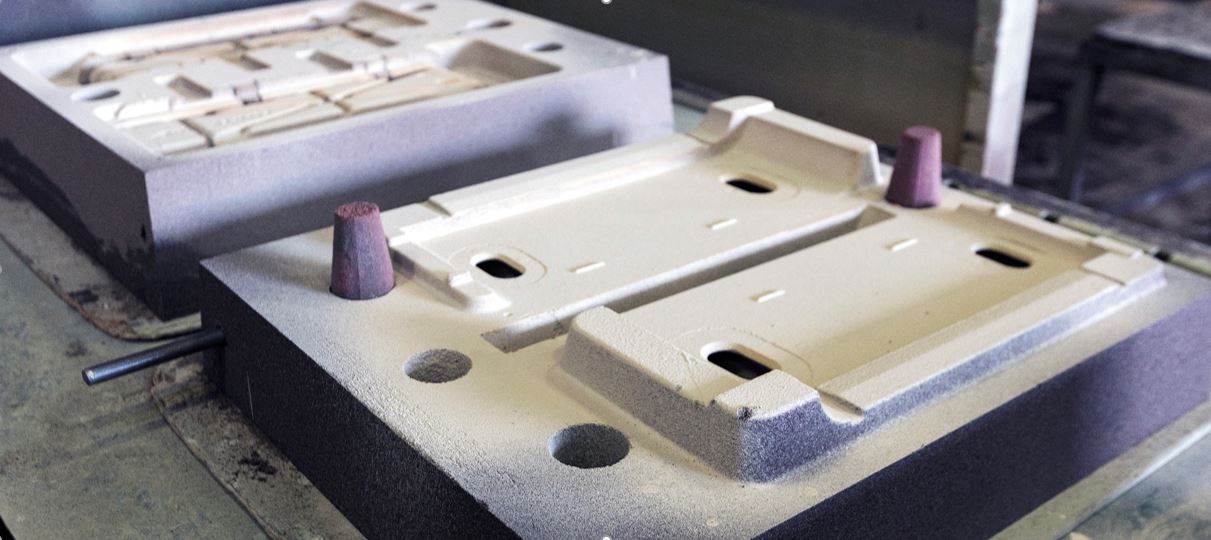
The pattern is nominally the same size and shape as the finished part, with adjustments to accommodate the sand casting process and the properties of the metal being poured. In addition, sprues, runners, gates and risers must all be included. These are the passages via which metal flows into the cavity formed in the sand by the pattern.
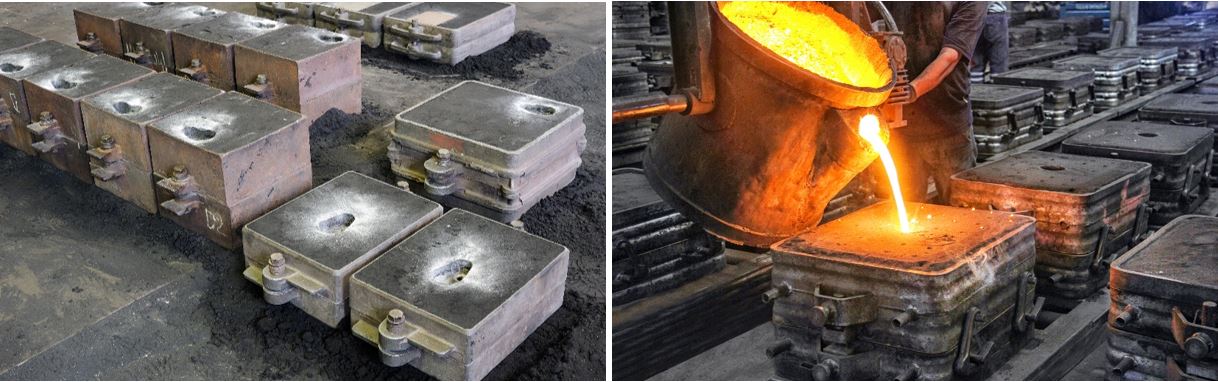
The sand for a sand casting is packed into two boxes. After the pattern is removed these are stacked one on top of the other. The lower box, the drag, always has a void formed by the pattern. It will also have channels for the metal to flow in.
The upper box, the cope, may not have any shape formed into it, in which case it’s called a “flat back.” Most complex castings do however need part of the shape forming in the cope, which creates a split and a parting line in the casting.
Pattern Considerations
There are several points to consider when designing and making the pattern.
- Pattern releases without damaging the sand – achieved by giving the sides of the pattern a draft angle rather than being vertical.
- Cavity fills smoothly – gates, usually positioned so the cavity fills from the bottom, are openings that limit how quickly metal flows in. The optimal speed fills with no turbulence or bubbles and without the metal freezing before it reaches all the internal corners and surfaces.
- Shrinkage and distortion allowances – metal contracts as it cools so to produce a part the size needed, the pattern must create a slightly larger cavity. Plus, the metal won’t cool at the same rate everywhere.
- Riser size – the riser is an open region in the cope that is the last part to fill. This provides a visual indication that the cavity is full. It also forms a reservoir of molten metal that flows back into the cavity as metal there cools and shrinks.
Planning How to Cast a Part
The first consideration is to ensure the pattern leaves no pockets where air can be trapped as the cavity fills. One aid to achieving that is to put the riser at the highest point. One feature of sand casting though is that, unlike die casting, trapped air can permeate through the sand to a small extent.
When a cast part comes out of the sand it has gates and risers attached. These must be cut off before the part can be machined.
A split casting will have a parting line running around the periphery. Tolerances in how cope and drag fit together, and in pattern placement, mean there may be a small offset between top and bottom halves of the casting.
The casting team will work with the part designer before the pattern is made to minimize how these features affect machining and the final part.
It’s all About the Pattern
A sand cast part can only be as good as the pattern allows. It takes a great deal of experience to get the best out of the process. At Impro we are internationally recognized for our sand casting expertise. If you’d like to know how we’d approach casting your parts, please contact us.